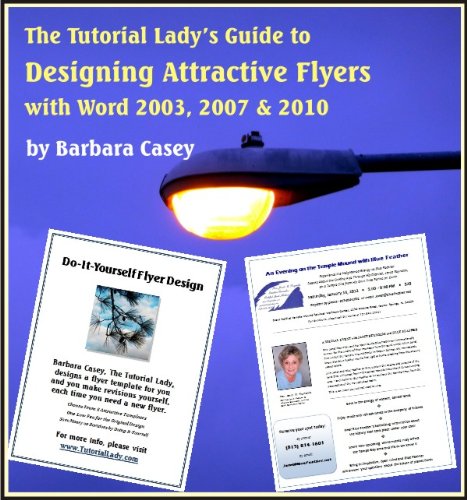
Tutorial Lady's Guide to Designing Attractive Flyers with Word 2003, 2007 & 2010 (Tutorial Lady Guides)

Tutorial Lady's Guide to Designing Attractive Flyers with Word 2003, 2007 & 2010 (Tutorial Lady Guides) is a promotional item. To increase sales of the product. It can make you love it. Tutorial Lady's Guide to Designing Attractive Flyers with Word 2003, 2007 & 2010 (Tutorial Lady Guides) is a great product. Quality of work. Corresponds to a very And that it is affordable. I bought it from the Internet to use Tutorial Lady's Guide to Designing Attractive Flyers with Word 2003, 2007 & 2010 (Tutorial Lady Guides) . And it makes me very impressed. I introduced people I know. Its good to see. Effective The collar is the most in demand. Tutorial Lady's Guide to Designing Attractive Flyers with Word 2003, 2007 & 2010 (Tutorial Lady Guides) is important to the price. If you want to see detail of Tutorial Lady's Guide to Designing Attractive Flyers with Word 2003, 2007 & 2010 (Tutorial Lady Guides) . Please click on the Get Discount Price Here.

Tutorial Lady's Guide to Designing Attractive Flyers with Word 2003, 2007 & 2010 (Tutorial Lady Guides) Overview
Although Microsoft Word was originally created as a word processing program, many people began using it as a design tool for flyers, advertisements, announcements, posters and more. And while Word doesn't have the same features and capabilities as Microsoft's desktop design Publisher program, you can still create a very attractive flyer or document, if you know a few tricks.
For example: When you insert a graphic into your Word flyer, does the text end up at the bottom, leaving a bunch of white space to the side of your picture? Here's the "how-to" from the tutorial:
WRAP TEXT around your graphic:
Right click your picture, click the Layout tab, and choose how you’d like your text to wrap around your picture. If you want white space on the sides of the graphic, choose the first option “In Line With Text.” This puts your first line of text at the bottom right of the graphic (the default that Microsoft Word gives for this option).
If you want your text to start higher up beside your picture, choose “Square” or “Tight.” You can also type text on top of the graphic - just make sure that “behind text” is selected in the “Wrapping Styles” section.
The tutorial will also teach you how to:
1) Set up the Quick Access Toolbar (Word 2007-2010)
2) Set page margins
3) Make a border around your page
4) Work with fonts
5) Embed your fonts (essential for making PDFs or emailing your flyer)
6) Format paragraphs (for automatic alignment, indents, line spacing and paragraph spacing)
7) Insert, resize, rotate, move and crop your graphics
8) Change graphic colors, make borders for graphics, wrap text around graphics and rotate or flip your pictures
If you need a flyer fast, there's a special section on working with Microsoft flyer templates.
And 11 QuickTips, including:
QuickTip #10: AUTOCORRECT OPTIONS:
In Word 2003, choose these “autocorrect” options at Tools, Autocorrect Options, Autoformat: Check “replace straight quotes with curly quotes” and “replace hyphens (--) with dash.”
For WORD 2007, click on the Office Button, click on Word Options, click on Proofing, then click on AutoCorrect Options and choose your preferences.
In Word 2010, you can click on the File tab, then Options, then Proofing. The AutoCorrect options are at the top of the pop-up page.
Whether you have the latest version of Microsoft Word (2010) or Word 2003 or 2007, you'll find instructions and tips for making great-looking flyers.
Have fun!
Tutorial Lady's Guide to Designing Attractive Flyers with Word 2003, 2007 & 2010 (Tutorial Lady Guides) Specifications
Although Microsoft Word was originally created as a word processing program, many people began using it as a design tool for flyers, advertisements, announcements, posters and more. And while Word doesn't have the same features and capabilities as Microsoft's desktop design Publisher program, you can still create a very attractive flyer or document, if you know a few tricks.
For example: When you insert a graphic into your Word flyer, does the text end up at the bottom, leaving a bunch of white space to the side of your picture? Here's the "how-to" from the tutorial:
WRAP TEXT around your graphic:
Right click your picture, click the Layout tab, and choose how you’d like your text to wrap around your picture. If you want white space on the sides of the graphic, choose the first option “In Line With Text.” This puts your first line of text at the bottom right of the graphic (the default that Microsoft Word gives for this option).
If you want your text to start higher up beside your picture, choose “Square” or “Tight.” You can also type text on top of the graphic - just make sure that “behind text” is selected in the “Wrapping Styles” section.
The tutorial will also teach you how to:
1) Set up the Quick Access Toolbar (Word 2007-2010)
2) Set page margins
3) Make a border around your page
4) Work with fonts
5) Embed your fonts (essential for making PDFs or emailing your flyer)
6) Format paragraphs (for automatic alignment, indents, line spacing and paragraph spacing)
7) Insert, resize, rotate, move and crop your graphics
8) Change graphic colors, make borders for graphics, wrap text around graphics and rotate or flip your pictures
If you need a flyer fast, there's a special section on working with Microsoft flyer templates.
And 11 QuickTips, including:
QuickTip #10: AUTOCORRECT OPTIONS:
In Word 2003, choose these “autocorrect” options at Tools, Autocorrect Options, Autoformat: Check “replace straight quotes with curly quotes” and “replace hyphens (--) with dash.”
For WORD 2007, click on the Office Button, click on Word Options, click on Proofing, then click on AutoCorrect Options and choose your preferences.
In Word 2010, you can click on the File tab, then Options, then Proofing. The AutoCorrect options are at the top of the pop-up page.
Whether you have the latest version of Microsoft Word (2010) or Word 2003 or 2007, you'll find instructions and tips for making great-looking flyers.
Have fun!
1. This page is a participant in the Amazon Services LLC Associates Program, an affiliate advertising program designed to provide a means for sites to earn advertising fees by advertising and linking to amazon.com
2. Amazon, the Amazon logo, Endless, and the Endless logo are trademarks of Amazon.com, Inc. or its affiliates.
3. CERTAIN CONTENT THAT APPEARS ON THIS SITE COMES FROM AMAZON SERVICES LLC. THIS CONTENT IS PROVIDED AS IS AND IS SUBJECT TO CHANGE OR REMOVAL AT ANY TIME.